
Tired of testing basic photo editing AI tools? What if, instead of adding multiple tools to your workflow, you could set up a single automated Shopify photo editing system for your eCommerce?
With Autophoto, teams are now automating almost 80% of their post-production workflow.
In this article, we’re going to break down exactly how you can automate Shopify photo editing for your store.
Our goal is simple:
Create a Custom Image Editing AI to automate Shopify photo editing for your eCommerce. This automation should be able to edit bulk images, follow custom editing requirements, and maintain consistency.
Let’s see how you can get started with Autophoto and achieve the results you want.
Table of Contents
Our Shopify image editing requirements
To make learning easy, we’ll create automation for a Shopify store the following requirements. You can freely adjust these based on your store and creative needs.
- Product Image BG: #F2F2F2
- Image File Format: WebP
- Image Size: 1500px X 1500px
- Margin: top:150px, left:150px, right:150px, bottom:300px
Getting Started with Autophoto
Autophoto.ai is a photo editing automation platform where you can create custom photo editing workflows, known as blueprints.
Once a blueprint is created in Autophoto, you can use it endlessly to edit bulk images with consistent results.
Within these blueprints, you can combine multiple AI tools such as product retouching, shadow adding, and background removal. Plus, set deliverables like image size, margins, alignment, background color, file format, and more.
As a result, you create an AI workflow that automates your entire Shopify Photo editing for your store.
Sign Up & Create Organization
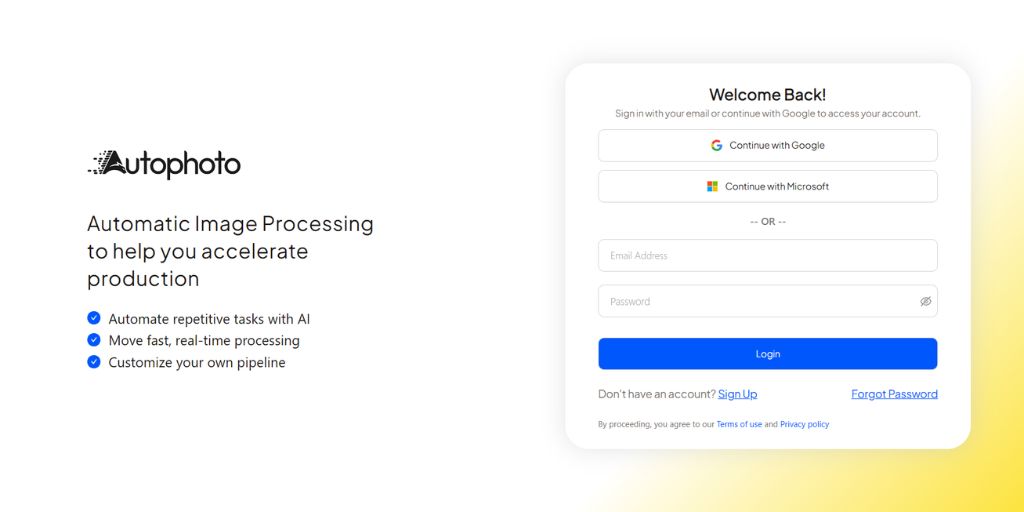
Autophoto.ai is designed for photography studios and retouching teams that need to edit bulk images on automation.
To get started, visit {https://app.autophoto.ai/} and sign-up using your preferred method.
Next, you’ll be asked to create an organization. This allows your team to work together within the same account and share existing blueprints.
(If your team is already using Autophoto, sign up using the email added by the admin as a member.)
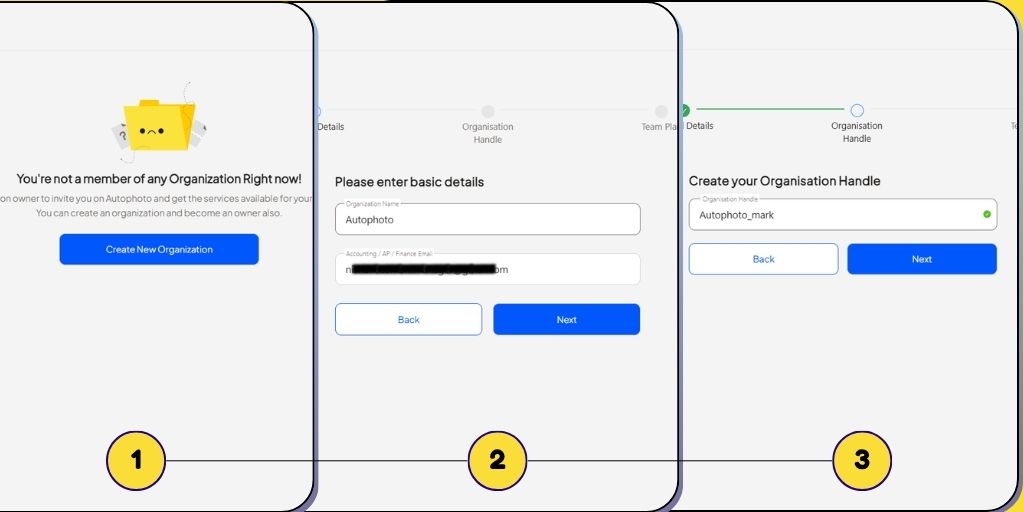
To create an organization, you’ll need:
- Organisation Name: The name of your organization.
- Accounting/AP/Finance Email: For invoicing.
- Organisation Handle: A unique handle to make searching easy.
Finally, choose a plan. If you’re just starting out, select the free plan to explore the platform. It can easily be upgraded later.
Once you complete this step, you’ll land on your Autophoto Dashboard. Let’s begin automating Shopify photo editing.

Step-by-Step Shopify Photo Editing with Autophoto
Since this is a beginner’s guide, we’ll walk through three stages:
- Create a Custom Photo Editing AI Blueprint
- Run a Quick Edit Batch to Test the Blueprint
- Start Bulk Photo Editing
1. Create Custom Photo Editing AI Blueprint
Go to the Blueprint section in the left sidebar. Here you’ll find both Autophoto’s templates and any blueprints created by your organization.
To create a new Shopify Photo Editing blueprint, click “Create New Blueprint” in the top-right corner.
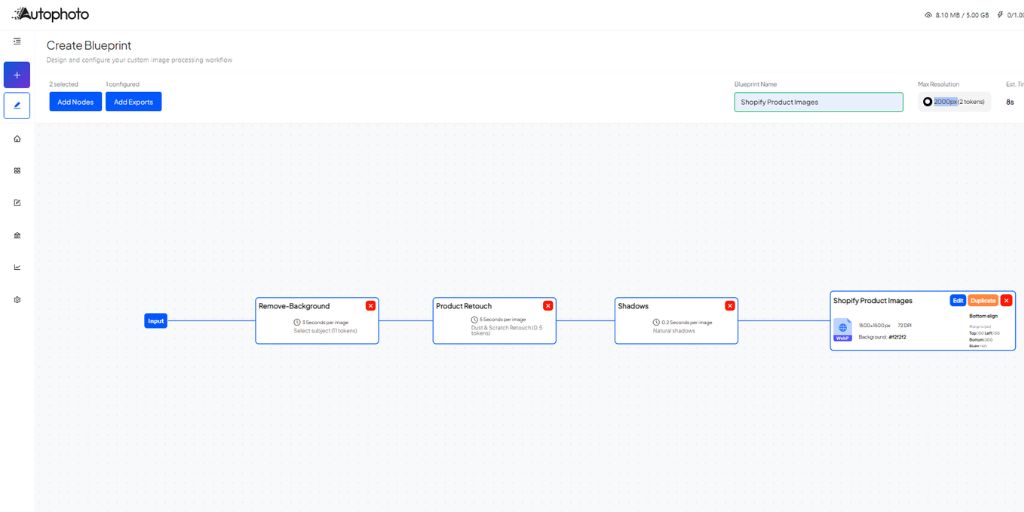
a. Selecting Editing Nodes
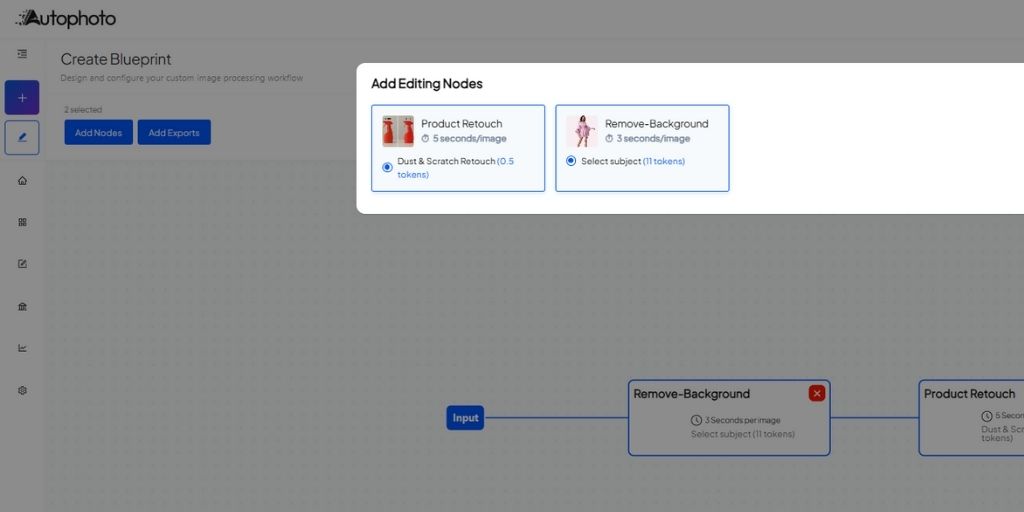
Start by naming the Blueprint, something memorable and descriptive. Since we’re working on Shopify, we’ll name it Shopify Product Images.
Next, select the AI photo editing nodes needed for Shopify photo editing. Based on our requirements, we’ll choose Product Retouch and Remove Background.
b. Deliverable Settings
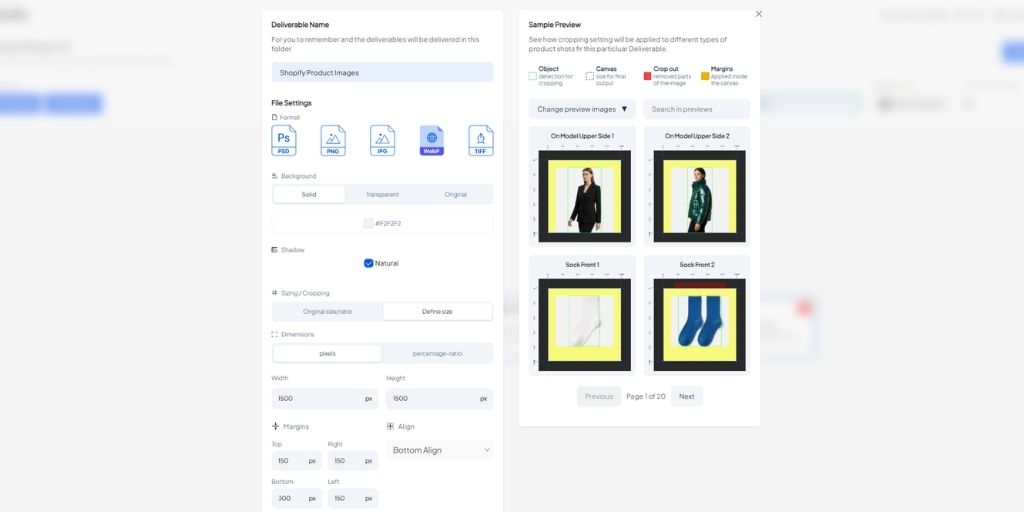
Above you choose the AI photo editing services you need. In this step, you will set-up how the images will be delivered.
- Deliverable Name: Name of the folder in which all the processed images will be saved.
- File Format: The type of file you want to receive.
- Background: It is the background type or color you want for your images.
- Shadow: The type of shadow you want for your product images.
- Sizing / Cropping: These are the dimensions of your image, product alignment, and margins.
As per our Shopify image editing requirements, we will go ahead with:
- Deliverable Name: Shopify Product Images
- File Format: WebP
- Background: Solid (#F2F2F2)
- Shadow: Natural
- Sizing / Cropping: W (1500 px) H (1500 px)
- Margin: top:150px, left:150px, right:150px, bottom:300px
While you are setting up your deliverables, you will be able to see sample images in the adjacent window.
At this stage, your node structure should be in a linear workflow.
c. Conditional Model Image Cropping (Optional)
Autophoto is not limited to linear AI photo editing workflows. The AI can detect models, posses, and photography shots to sort them and deliver them separately.
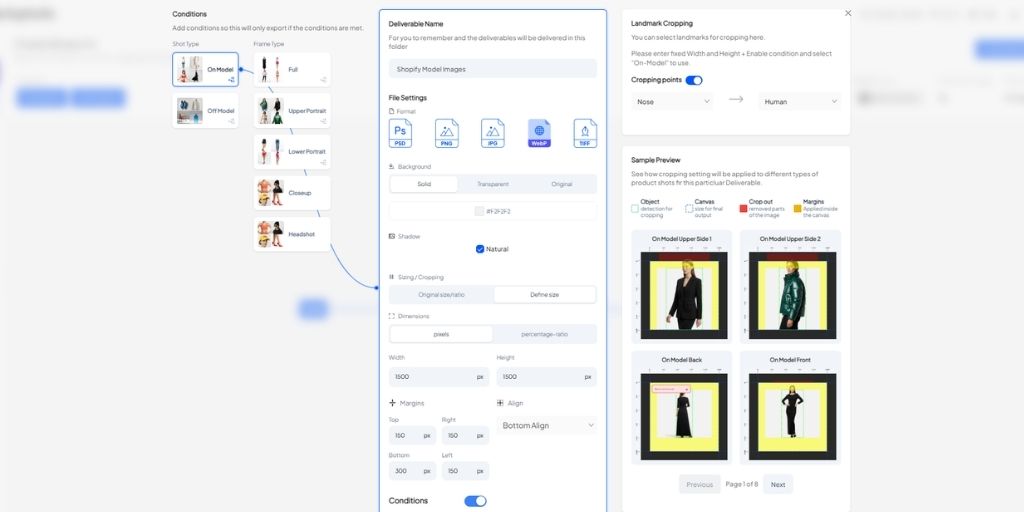
For example, if you want different deliverables for product closeups, full-frame images, headshots, or specific angles, you can set conditional deliverables.
This allows you to upload a single batch and automate editing for all image types at once.
2. Run Quick Edit Batch to Test AI Blueprint
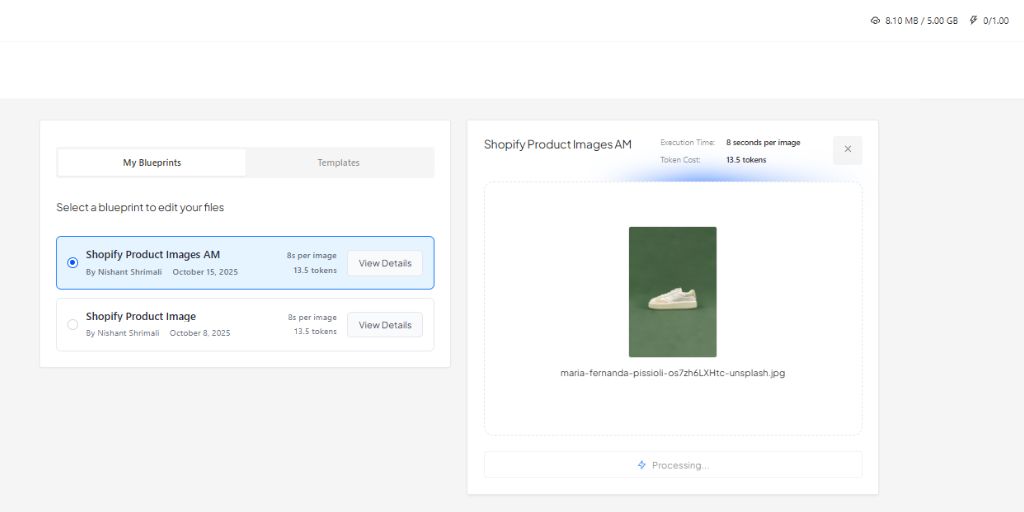
Now that we have created an Autophoto Blueprints, it’s time to run a test. This ensures your edits look right before running a full batch.
From the left sidebar you will find a dedicated “Quick Edit” button.
Click on Quick Edit > Select template you want to test > Upload an image for the test.
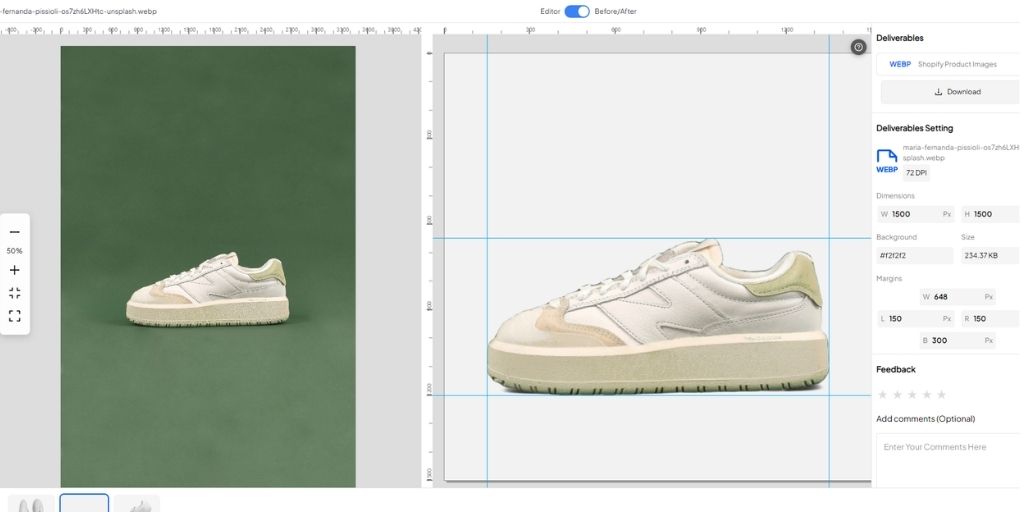
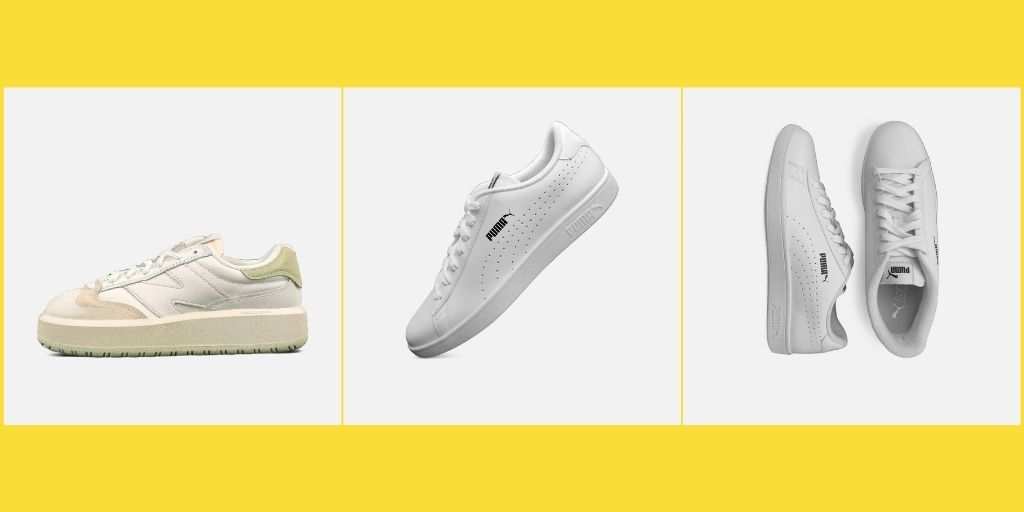
Within seconds, you’ll see the edited file optimized exactly as per your Blueprint. You can download it directly or open it in Autophoto’s Editor.
3. Start with Bulk Photo Editing
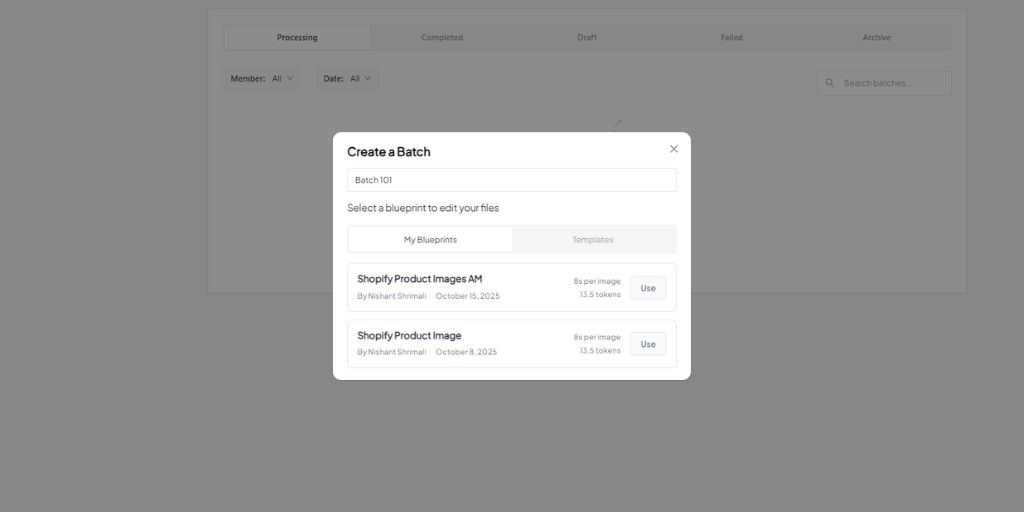
Now that we have tested Blueprint, it’s time to create and run a batch. Again, in the left sidebar, click on “Create Batch”.
Here, first you will enter the Batch name. This is simply the name of this particular batch, so for this example, we name it “Batch 101”.
Next, select the Blueprints you created for Shopify Photo Editing.
At this point you are all set to upload all your product images. Here you can either upload raw images, or you can upload entire folders in the Autophoto.
The best thing about uploading folders on Autophoto is the output also follows the folder structure you uploaded. Meaning, images that are found in separate sub-folders are placed identically in different folders.
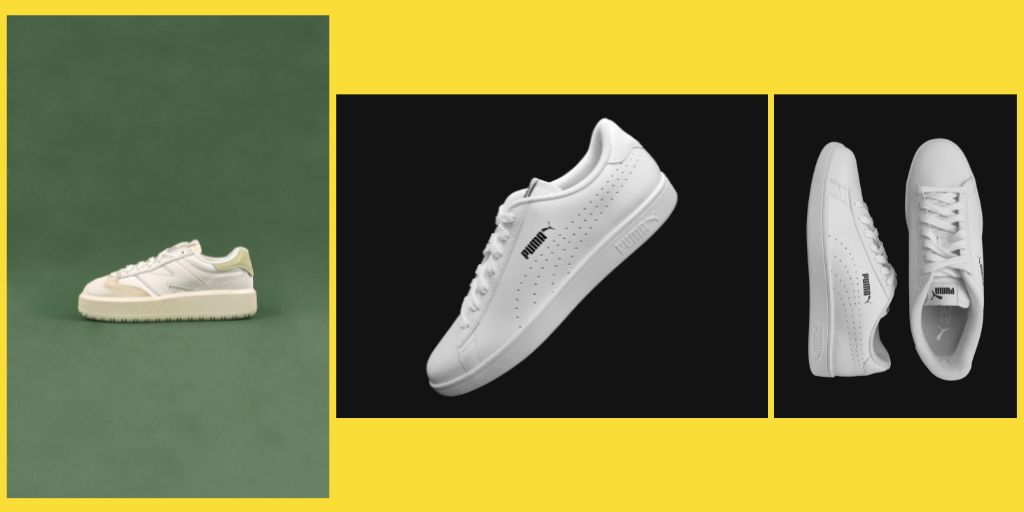
Here, for example, we are using 3 distinct shoe images with different backgrounds, lighting, and orientations.
This is so we can test the output on all the bases.
Once all the files are uploaded, click on the “Execute” button on the top right corner. This way file processing will start right away.
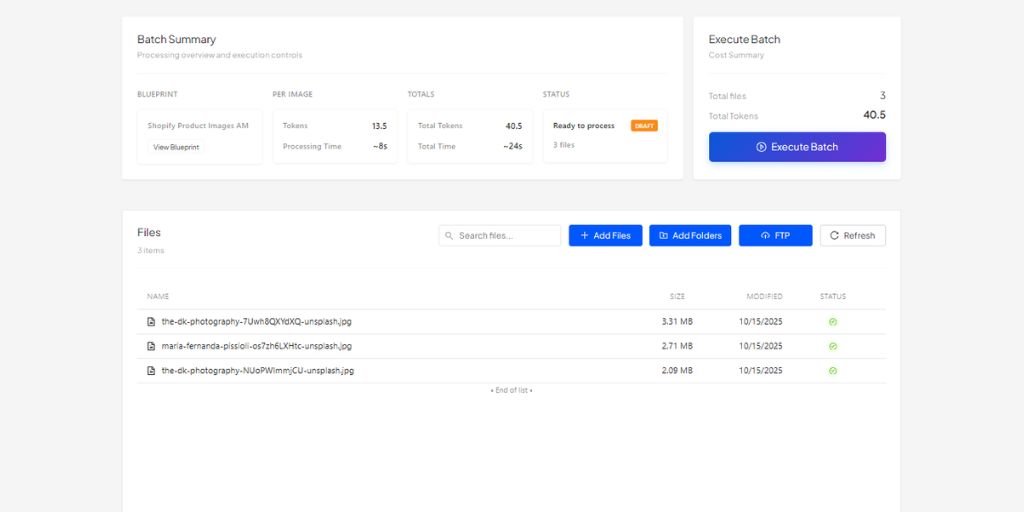
During this time, you can either sit back and let the AI Shopify Photo Editing do its job or upload another batch simultaneously.
Autophoto has the capability of concurrently working on multiple batches at the same time.
Why Use Autophoto for Shopify Photo Editing?
Shopify stores rely on product images to drive clicks, build trust, and convert visitors into buyers. But editing every image manually or juggling multiple AI tools can quickly become overwhelming.
Autophoto solves this problem by turning your photo editing workflow into a fully automated system designed for speed, scale, and consistency.
1. Automate Repetitive Editing Tasks
Background removal, retouching, resizing, shadow adjustments Autophoto handles all of it automatically. Once you create your Blueprint, you can process hundreds of images in just a few clicks, without repeating the same edits over and over.
2. Maintain Consistency Across Your Store
Shopify thrives on visual uniformity. Autophoto ensures every image follows the exact same specifications, whether it’s size, margin, background color, or file format. The result is a polished, professional storefront that looks cohesive across all product pages.
3. Edit in Bulk Without Compromising Quality
Whether you’re uploading 10 images or 10,000, Autophoto’s workflow runs at scale. Your edits remain accurate and aligned with your brand’s requirements, allowing teams to deliver faster without cutting corners.
4. Customizable AI Workflows for Any Brand
Every store has unique editing needs. With Autophoto’s Blueprint system, you can build workflows that reflect your exact editing preferences from model image sorting to specific cropping rules so your output looks exactly the way you want it to.
5. Designed for Teams and Studios
Autophoto isn’t just a solo tool. It’s built for photography studios, agencies, and in-house teams. With shared organizations, multiple team members can access and run the same blueprints, ensuring everyone stays aligned and productive.
6. Faster Turnaround, Lower Costs
By automating the bulk of post-production work, Autophoto helps you cut turnaround times drastically while reducing the need for manual editing hours. This means faster product launches and better margins.
Conclusion
Automating your Shopify photo editing doesn’t have to be complicated. With Autophoto, you can set up a single AI-powered workflow that handles everything from background removal and retouching to sizing, formatting, and batch processing without relying on multiple tools or endless manual edits.
Also by creating custom Blueprints, just once, you can maintain consistency across every product image, edit in bulk at scale, and significantly reduce turnaround times.
Whether you’re managing a growing Shopify store, running a photography studio, or leading a post-production team, Autophoto gives you the speed, control, and flexibility needed to keep up with your content demands.
Start automating your Shopify photo editing today, and focus your time where it matters most growing your business.